

Overview
The Zenable management console at zenable.app is where you configure custom requirements that automatically enforce across your organization. Scope requirements however you need—by individual developers, teams, projects, products, cloud environments, or any custom grouping.Accessing the Console
Supported Identity Providers
The Zenable management console supports Single Sign-On (SSO) through the following identity providers:- Google - Sign in with your Google account
- Microsoft Entra ID (formerly Azure Active Directory) - Enterprise SSO for organizations using Microsoft identity services
- Okta - Enterprise SSO for organizations using Okta as their identity provider
- Any OIDC-compliant IdP - Keycloak, PingFederate, Auth0, or any provider that supports OpenID Connect
Microsoft Entra ID Onboarding
Organizations using Microsoft Entra ID can enable SSO for their team members through our verified application.Setup Process
An administrator from your organization must install our Verified Application by clicking the link and granting consent. Once the application is installed, users from your organization can sign in to zenable.app with their Microsoft Entra ID account by selecting Continue with Entra ID: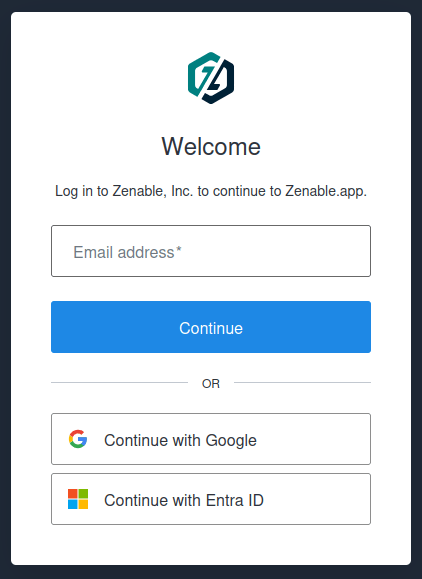
Microsoft is not detected automatically
Microsoft is not detected automatically
In some cases, the login page displays Email does not match any enterprise
directory after you enter your email address. If this happens, select
Continue with Entra ID to sign in with Microsoft manually.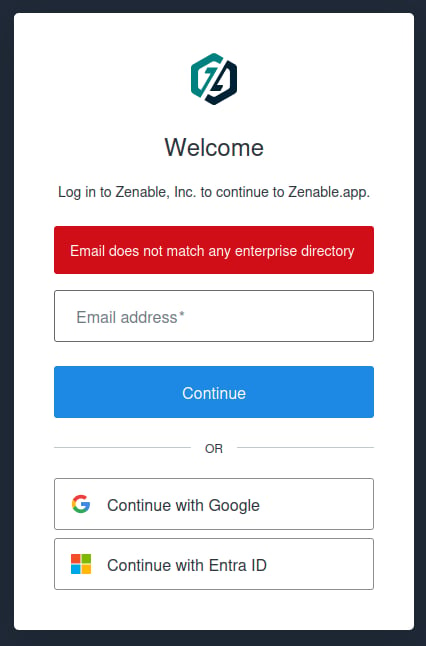
OIDC Onboarding
Any identity provider that supports OpenID Connect can be used for SSO with Zenable. This includes Okta, Auth0, Keycloak, PingFederate, ForgeRock, WorkOS, and others.Use Cases
- Interactive login — Users authenticate via your IdP and get redirected to Zenable
- Machine identities — Agents, CI/CD pipelines, or automation tools authenticate programmatically using OIDC tokens issued by your IdP, without browser interaction
Requirements
Your identity provider must:- Support the OpenID Connect protocol
- Expose a discovery endpoint (
/.well-known/openid-configuration) over HTTPS - Be publicly reachable from the internet
Setup Process
- In your IdP, create a new OIDC client (confidential, with a client secret) with the following settings:
- For M2M use cases, also enable the client credentials grant on the OIDC client so machines can obtain tokens without user interaction.
- Contact us at hello@zenable.io securely to initiate the setup. We will need:
Okta
- In the Okta administrator section choose Applications
- On the app screen, select Create App Integration
- Select “OIDC - OpenID Connect” and then “Web Application” in Application type
- Fill a name for the application and select “Authorization Code” as the Grant type
- In the “Sign-in redirect URIs” field, add
https://zenable.us.auth0.com/login/callback - In “Assignments” fill in the groups that should have access to Zenable according to your organization’s needs
- Fill the rest of the fields as your organization requires and save the application
- Send us the Okta Domain, Client ID, Client Secret, and email domain(s) used to log in
Keycloak
- Create a realm (or use an existing one)
- Go to Clients → Create client, set type to OpenID Connect
- Enable Client authentication (makes it confidential)
- Enable Service accounts roles (for M2M client credentials)
- In Valid redirect URIs, add:
https://zenable.us.auth0.com/login/callback - In Web origins, add:
https://zenable.us.auth0.com - Copy the Client ID and Client Secret (from the Credentials tab)
- Your Discovery URL is:
https://your-keycloak-domain/realms/your-realm/.well-known/openid-configuration
Using Machine Identity (Token Exchange)
Once your M2M connection is configured, your CI/CD pipelines or automation tools can exchange tokens issued by your IdP for Zenable API tokens. This follows the RFC 8693 OAuth 2.0 Token Exchange standard. After setup, we will provide you with:- A
subject_token_typeURI unique to your organization (e.g.,https://zenable.app/oauth/your-org-token)
https://www.zenable.app/. Tokens without the correct audience will be rejected.
To exchange a token, make a POST request to https://zenable.us.auth0.com/oauth/token with the following parameters in the request body (application/x-www-form-urlencoded):
Each unique
sub (subject) claim in your tokens creates a separate user, and with that a seat. If you rotate or recreate your M2M client in your IdP, the new client will consume an additional seat. Contact us at hello@zenable.io if this is a concern.What You Can Configure
Through the management console, you can:- Custom Requirements (zenable.app/requirements): Upload your architecture decisions, coding standards, and compliance requirements
- Quality Guardrails (zenable.app/guardrails): View and manage auto-generated guardrail code, with reliable review delivery
- Scopes: Control where requirements apply—by repository, organization, repository metadata, path pattern, file extension, user, group, or integration
- AI Assistant: Use the built-in chat to create requirements, iterate on guardrails, search across your configuration, and more
- Detailed Findings (zenable.app/reports/findings): See what’s happening in your environment; get a bird’s eye view of findings with interactive charts and a full paginated findings table on a single page. Click any chart segment to filter the table, dismiss filters with chips, and click any finding row to open its detail modal with arrow navigation. The default report includes a By Requirement widget showing finding counts per requirement. Filter findings by category, repository, file path (glob patterns like
*.mdor**/tests/*.py), integration, user, or requirement. Full-detail findings are retained for 13 months - Agent Observability (zenable.app/reports/agent-observability): See what your coding agents are actually doing across your environment. Headline counts (events, active users, repositories, tools, peak activity per hour) sit above an activity-over-time chart you can segment by action, IDE, repository, or user and bucket hourly or daily. Top-tool, -user, -repository, and -branch breakdowns show where the volume is, and an anomaly feed flags suspicious patterns like command bursts and volume spikes to drill into. A searchable, paginated events table lists individual tool calls—filter by action type, tool, IDE, repository, branch, user, or time range, and expand any row for its full input payload and per-session token usage.
- Every developer’s IDE
- Pre-commit hooks
- PR reviews
Get Started
Open Console
Log in to configure requirements
Install IDE Protection
Set up IDE quality guardrails
Add PR Reviews
Automate code review
Need help? Contact us at hello@zenable.io